How to scan a receipt and log expenses
Take a photo of a receipt. It's read for you, split by category and saved with the receipt attached.
Scan a receipt
- Go to Expenses (under More in the menu) and press Scan receipt. On a phone, use Upload receipt on the home screen.
- Take a photo of the whole receipt, or choose a photo or PDF.
- JobBills reads the store, date, items, tax and total. It splits the total by category and suggests the job from that day.
- Check everything and fix anything that's wrong.
- Press Save. Nothing is saved until you do.
Each category is saved as its own expense, with the receipt attached.
Tip: If the photo can't be read, try a clearer photo in good light, or choose Add it by hand. The photo stays attached.
Add an expense by hand
- Press + Add expense.
- Attach the receipt photo or file.
- Fill in the Date, Total amount, Vendor / store and Sales tax on receipt.
- Choose Paid with: Business card, Business bank, Cash, or Personal card (reimburse me).
- Optional: pick the Job and add a Note.
- Press Save.
Paying people back
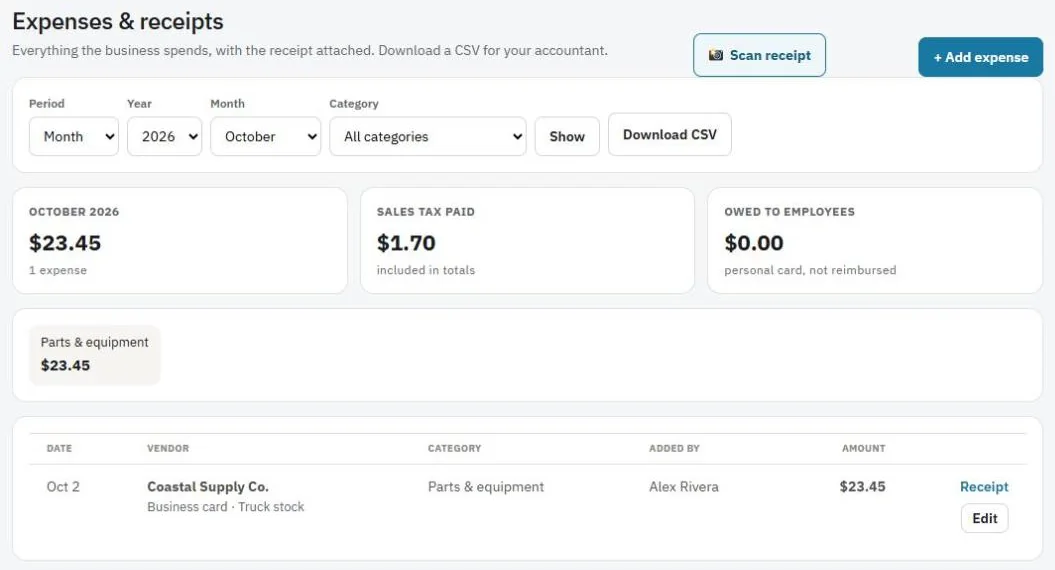
Expenses paid with a personal card show under Owed to employees until the owner marks them reimbursed.
See and download
Use Period, Year, Month and Category and press Show. You'll see totals by category and the sales tax paid. Press Download CSV for your accountant.
Note: Only the owner can edit or delete an expense after it's saved.
Was this guide helpful?
Related guides
How to log and pay back mileageHow to see a Big Job's profitHow to connect QuickBooks OnlineStill stuck? Inside JobBills, press the round ? button to ask the help chat, or email [email protected].